Skip to content
  • Home
  • Pricing
  • Support
  • Download
  • My account
auto rigger
  • Home
  • Pricing
  • Support
    • Documentation
    • Tutorials
    • Create A Ticket
    • Contact Us
    • Changelog
  • Download
MY ACCOUNT
auto rigger

Setup Arise

6
  • Introduction
  • System Requirements
  • Create Account / Login
  • Installation
  • License Activation Instructions
  • Troubleshooting

Getting Started Tutorial

8
  • Interfaces (UI)
  • How To Prepare The Model For Rigging?
  • What Are Nodes, Attachments, and Presets?
  • What Are Guides?
  • What is The Attribute Editor?
  • Let’s Start Rigging
  • How To Export Rigs?
  • Digging Deeper

Elements

29
  • Node
  • Attachment
  • Presets
  • Attribute Editor And Attributes Types
  • Workspace
  • Outliner
  • Guides
  • Connections
  • Loading/Saving
  • Placeholders
  • Dump_grp
  • Skinning Joints
  • Poses
  • Group Node
  • Rig Base Node
  • Helper Tools
  • Preferences
  • Scene Settings
  • Log Viewer
  • Model Validation Checks
  • Model Updater
  • AI Auto Guides Placement
  • Rig Mocap Tester
  • Rig Export
  • Batch Menu
  • Sticky Note
  • API Commands
  • Custom Ctrls Shapes
  • Ctrl Shapes Lookup

How To Create Your Own Node

6
  • The Basics On How To Create Your Own Node
  • Creating Attributes
  • Creating Guides
  • IoJoint
  • IoTransform
  • Example Node Module

How To Create Your Own Attachment

1
  • Creating Custom Attachments in Arise

Basic Nodes

8
  • Base Node
  • One Joint
  • FK Chain
  • IK Chain
  • Two Joints IK
  • Dynamic FK Chain
  • Eye
  • Path

CA Nodes

12
  • CA_Spine
  • CA Head
  • CA Leg
  • CA Arm
  • CA Fingers
  • CA_Mouth
  • CA Eye
  • CA Quadruped Back Leg
  • CA Quadruped Front Leg
  • CA Ribbon
  • CA Tentacle
  • CA Wing

Attachments

22
  • SpaceSwitch
  • CtrlsShape
  • CtrlsSettings
  • MakeDynamic
  • FollowSkeleton
  • PostScript
  • MovablePivot
  • HelperJoints
  • Rename
  • AttributesSettings
  • CustomDriver
  • CustomDriven
  • ManualConnections
  • AddJoints
  • AddGroupAbove
  • JointsSettings
  • Parent
  • AddAttribute
  • ConnnectAttribute
  • HumanIK
  • CtrlsLockHideAttributes
  • CtrlsLimitAttributes

Mechanical

2
  • Vehicle Body
  • Wheel
View Categories
  • Home
  • Arise Docs
  • Getting Started Tutorial
  • Let’s Start Rigging

Let’s Start Rigging

Having prepared the model and learned the basics, we’re almost ready to begin rigging our character.

But first, we will start by bringing in the model using the ‘Model Updater’.
If we only began rigging, this tool won’t do much, but in the future if the model will change and we will need to update the model, this tool will assist us in transferring the skinning from the old model to the new.

  1. Create a new Maya scene (Ctrl+N) and a new Arise scene.
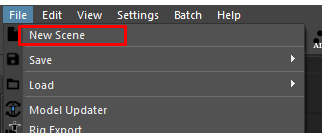
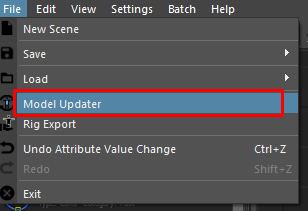
  2. In ARISE go to ‘File’ menu -> ‘Model Updater‘.

  3. In the field ‘New Model Path’, enter the path to the Maya model file we created earlier.
  4. Press the ‘Reference and Analyze’ button. This will display compare items, but as this is our first model version, there are no weights to transfer. You can read more about it here.
  5. So simply click ‘Finalize and Close’. This will create the rig groups structure in Maya, parent the new models under ‘Geometry_grp’, and tag the new meshes to make them upgradable in the future.

So far in this tutorial, we have cleaned the model, learned some concepts, and imported the model into a new rigging scene.

Let’s start rigging the character now:

  1. Go to the ‘Presets‘ tab in the ‘Inventory’ docked widget.
  2. Double-click on the preset that best fits your character.
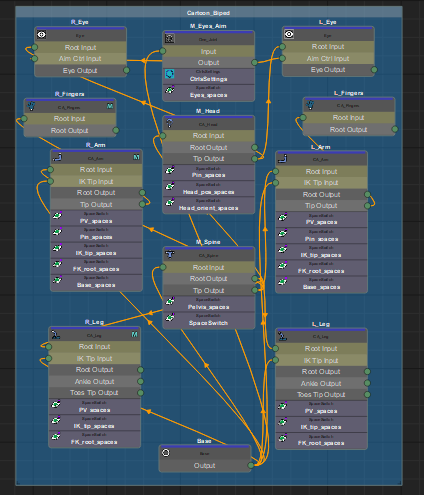
    Nodes, attachments, and their connections will be created in the workspace that together form an advanced rig.

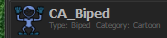
  3. Switch all the nodes to ‘Template‘ mode so we can position their guides.
  4. Position all the guides to match the character’s anatomy.
    Help on how to position the guides is available in the node documentation (‘Attribute Editor’ Docs tab or here).
    Remember that even if you position the guides incorrectly, you can always fix them later.

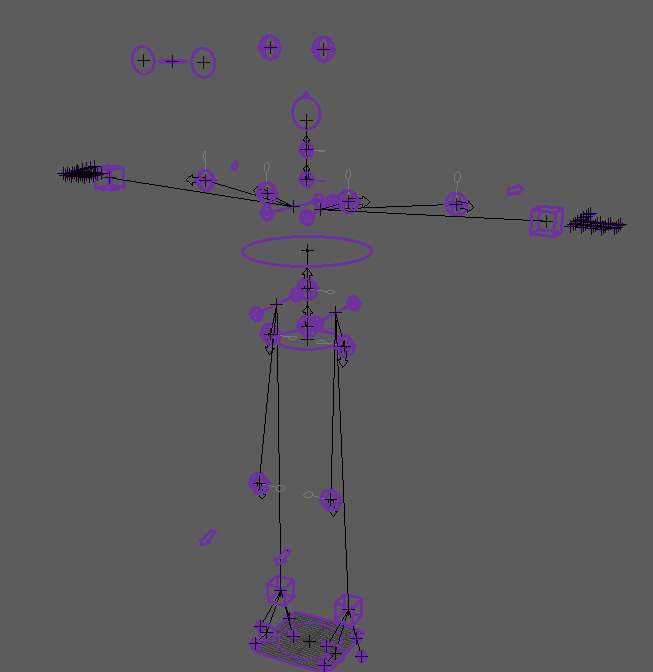
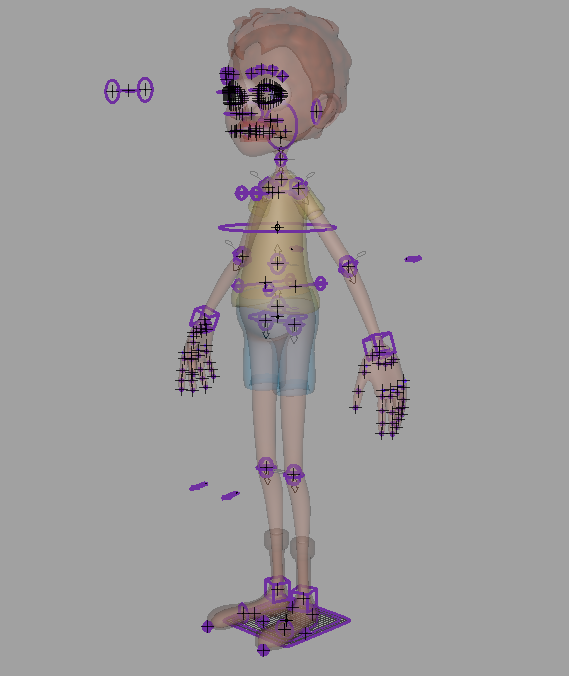
  5. Once that’s done switch all the nodes to ‘Build‘ mode.
  6. Are the ctrls too large or too small? You can play around with the ‘Ctrls Scale’ attribute on the nodes then click ‘Re-build’.
    (You can ‘Re-Build’ only selected nodes by right-clicking on an empty spot in the workspace and then clicking on ‘Build Selected Nodes’)
  7. After you have built the rig that matches the anatomy of your character, you can start skinning it.
    Select the meshes you wish to skin and click the ‘Skin Selected’ button on the ‘Helper Tools’ menu (see below).
    ‘Skin Selected’ is just a convenience button for creating skinClusters on selected meshes with all the nodes skinning joints as influences.

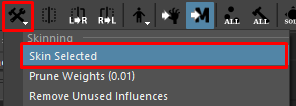
     Your character is now ready to be skinned using Maya’s skinning tools.
    Another reminder that even after skinning your character, you can always switch to ‘Template’ mode and reposition guides without losing your progress.

_____________________________________________
Get Arise at: https://www.ariserigging.com

Updated on May 13, 2026

What are your Feelings

Share This Article :

  • Facebook
  • X
  • LinkedIn
  • Pinterest
What is The Attribute Editor?How To Export Rigs?
  • Home
  • Pricing
  • Support
  • My account
  • Privacy Policy
  • EULA

Copyright © 2026 - Arise Rigging System

This website uses cookies to ensure you get the best experience. By using this site, you agree to our use of cookies.
Accept
Manage consent

Privacy Overview

This website uses cookies to improve your experience while you navigate through the website. Out of these, the cookies that are categorized as necessary are stored on your browser as they are essential for the working of basic functionalities of the website. We also use third-party cookies that help us analyze and understand how you use this website. These cookies will be stored in your browser only with your consent. You also have the option to opt-out of these cookies. But opting out of some of these cookies may affect your browsing experience.
Necessary
Always Enabled
Necessary cookies are absolutely essential for the website to function properly. These cookies ensure basic functionalities and security features of the website, anonymously.
CookieDurationDescription
cookielawinfo-checkbox-analytics11 monthsThis cookie is set by GDPR Cookie Consent plugin. The cookie is used to store the user consent for the cookies in the category "Analytics".
cookielawinfo-checkbox-functional11 monthsThe cookie is set by GDPR cookie consent to record the user consent for the cookies in the category "Functional".
cookielawinfo-checkbox-necessary11 monthsThis cookie is set by GDPR Cookie Consent plugin. The cookies is used to store the user consent for the cookies in the category "Necessary".
cookielawinfo-checkbox-others11 monthsThis cookie is set by GDPR Cookie Consent plugin. The cookie is used to store the user consent for the cookies in the category "Other.
cookielawinfo-checkbox-performance11 monthsThis cookie is set by GDPR Cookie Consent plugin. The cookie is used to store the user consent for the cookies in the category "Performance".
viewed_cookie_policy11 monthsThe cookie is set by the GDPR Cookie Consent plugin and is used to store whether or not user has consented to the use of cookies. It does not store any personal data.
Functional
Functional cookies help to perform certain functionalities like sharing the content of the website on social media platforms, collect feedbacks, and other third-party features.
Performance
Performance cookies are used to understand and analyze the key performance indexes of the website which helps in delivering a better user experience for the visitors.
Analytics
Analytical cookies are used to understand how visitors interact with the website. These cookies help provide information on metrics the number of visitors, bounce rate, traffic source, etc.
Advertisement
Advertisement cookies are used to provide visitors with relevant ads and marketing campaigns. These cookies track visitors across websites and collect information to provide customized ads.
Others
Other uncategorized cookies are those that are being analyzed and have not been classified into a category as yet.
SAVE & ACCEPT